
Overview
Custom Pods extend the already feature-rich functionality of meetings in Adobe Connect. Use Custom Pods to provide a more interactive, professional or enhanced experience for hosts and participants.
Download
Custom Pods are available from a variety of sources. Envolvemedia is proud to provide a number of custom pods for Adobe Connect. They are also available on Adobe’s website, along with other third-party pods.
- To download a custom pod from Envolvemedia:
-
-
- Find a pod from Envolvemedia’s Custom Pod site
- Either click Download at the bottom of each pod, or click the Details button to get more information about the pod and then click download.
-
- To download a custom pod from Adobe:
-
-
- Find a pod from the Apps & Integrations page on Adobe’s website
- Click Learn more> at the bottom of each pod
- Click the Download button typically found on the top/left -hand side of the page
-
- To download an update for any Envolvemedia Custom Pod:
Some pods from Envolvemedia include an upgrade feature. With a click of a button, it is easy to tell if the current pod is the latest version, or if there is an update available. To check/download an update to custom pod:
-
-
- In a meeting running an Envolvemedia Pod, as a host, click on the help/about button, from the Custom Pod Settings Bar
- When supported, click the Check for update Otherwise, when not supported, this button will not appear
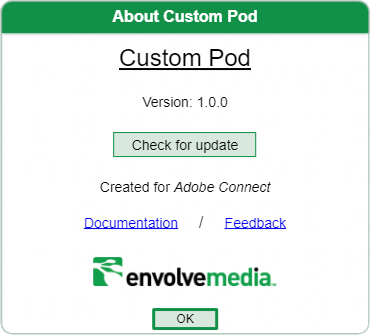
- If an update is NOT available, the button label changes to No update available
- If an update IS available, the button label changes to Download Update; and information about the update is displayed
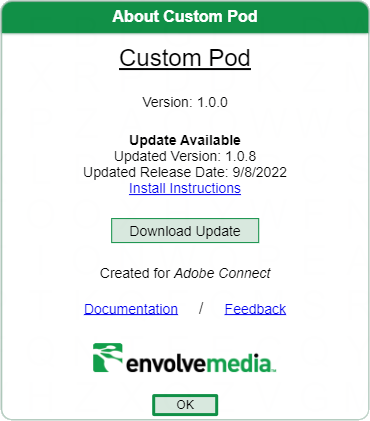
- Clicking Download Update will download the updated Custom Pod package (a .zip file) and usually place it in your Downloads folder
- In a meeting running an Envolvemedia Pod, as a host, click on the help/about button, from the Custom Pod Settings Bar
-
Import Custom Pods into Adobe Connect
After downloading, there are multiple ways to install or import the pod for use in a Connect Meeting
Sharing a Custom Pod directly in an Adobe Connect Meeting
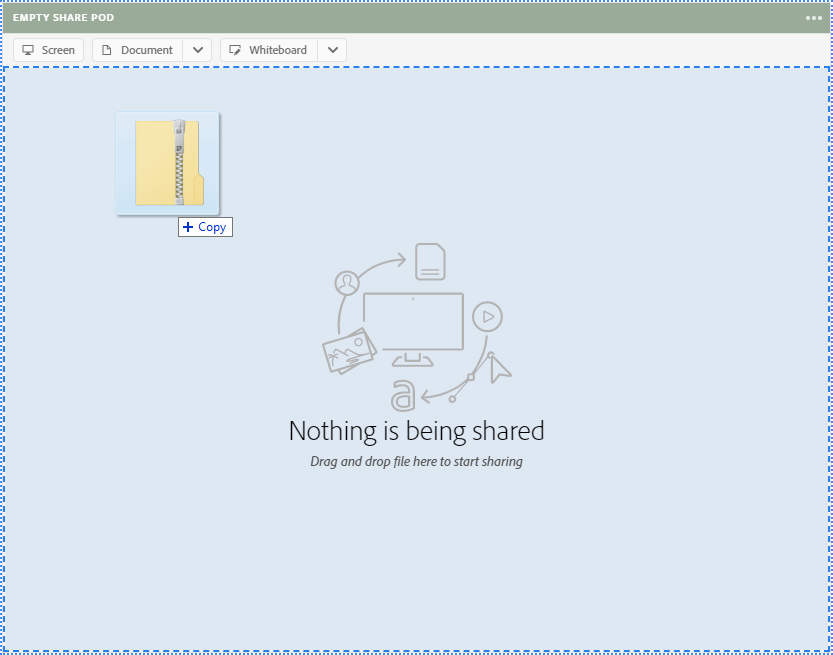
Importing a custom pod can be as easy as dragging and dropping the Custom Pod (.zip file) directly into an empty Share Pod
- Click Pod Share options and select Share > Add New Share
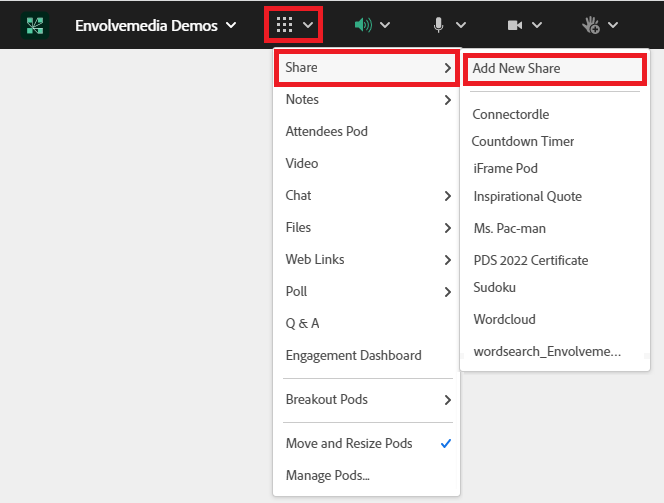
- When the new/empty share pod appears, Custom Pods can be imported directly into an Adobe Connect Meeting, using one of the following methods:
-
- Drag and drop the Custom Pod ZIP file directly into the share pod
- Custom Pods can also be imported by using the standard menu items. Select Document > Browse My Computer and select the ZIP file from its downloaded location on your computer.
- Custom Pods can also be shared from the Shared Content (or My Content) folders of Adobe Connect by following a similar process. This method is preferred for content that is shared among multiple Meetings, such as Custom Pods
- Drag and drop the Custom Pod ZIP file directly into the share pod
-