
Overview
Captivate developers add this to their captivate file for modules designed to be imported into an Adobe Connect Curriculum or Adobe Learning Manager. This widget will get information on the next item/module, if available. The widget can then either create a built-in button or use a custom button as created by the Captivate developer that automatically launches the next item – without requiring the end-user to close the content, find the next item in the list and click to launch.
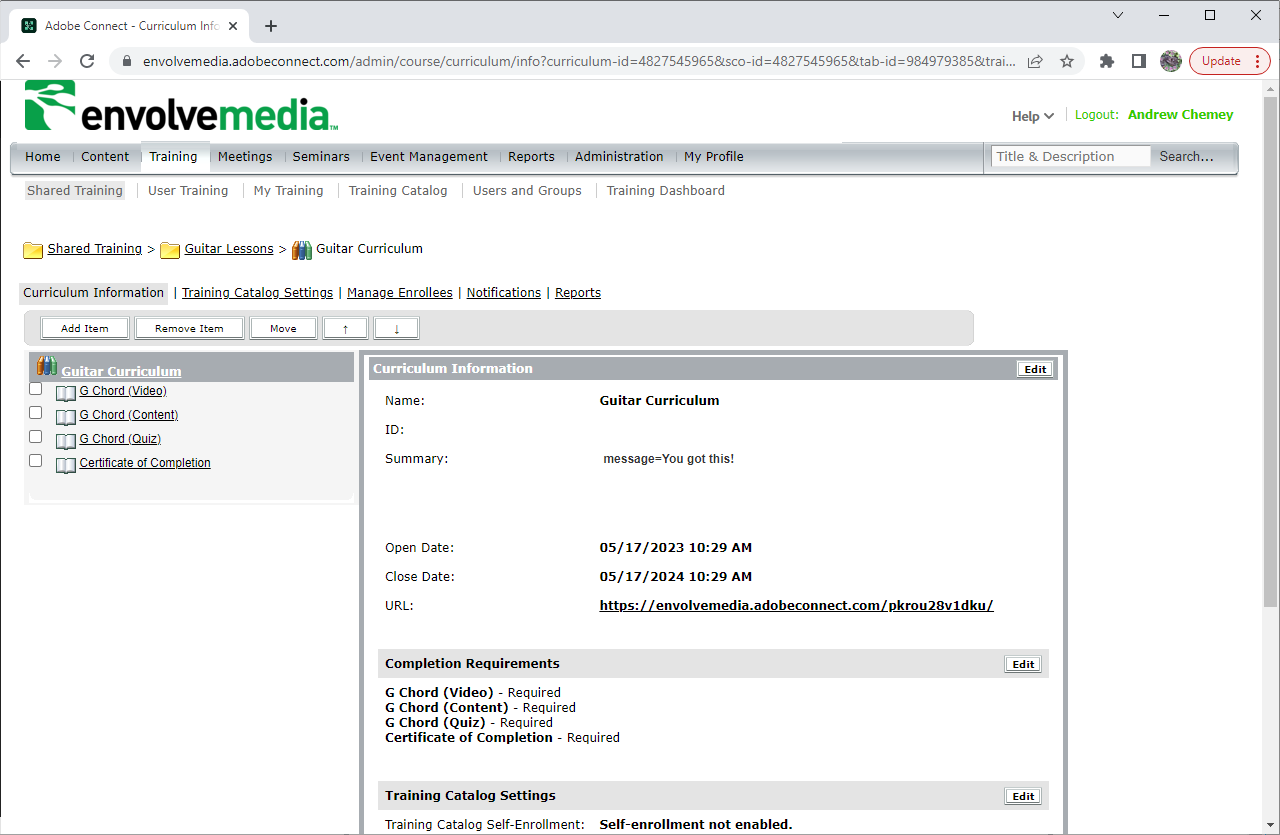
Example 1: Curriculum in Adobe Connect. The Next Item functionality would work with the first three items, to launch the next item
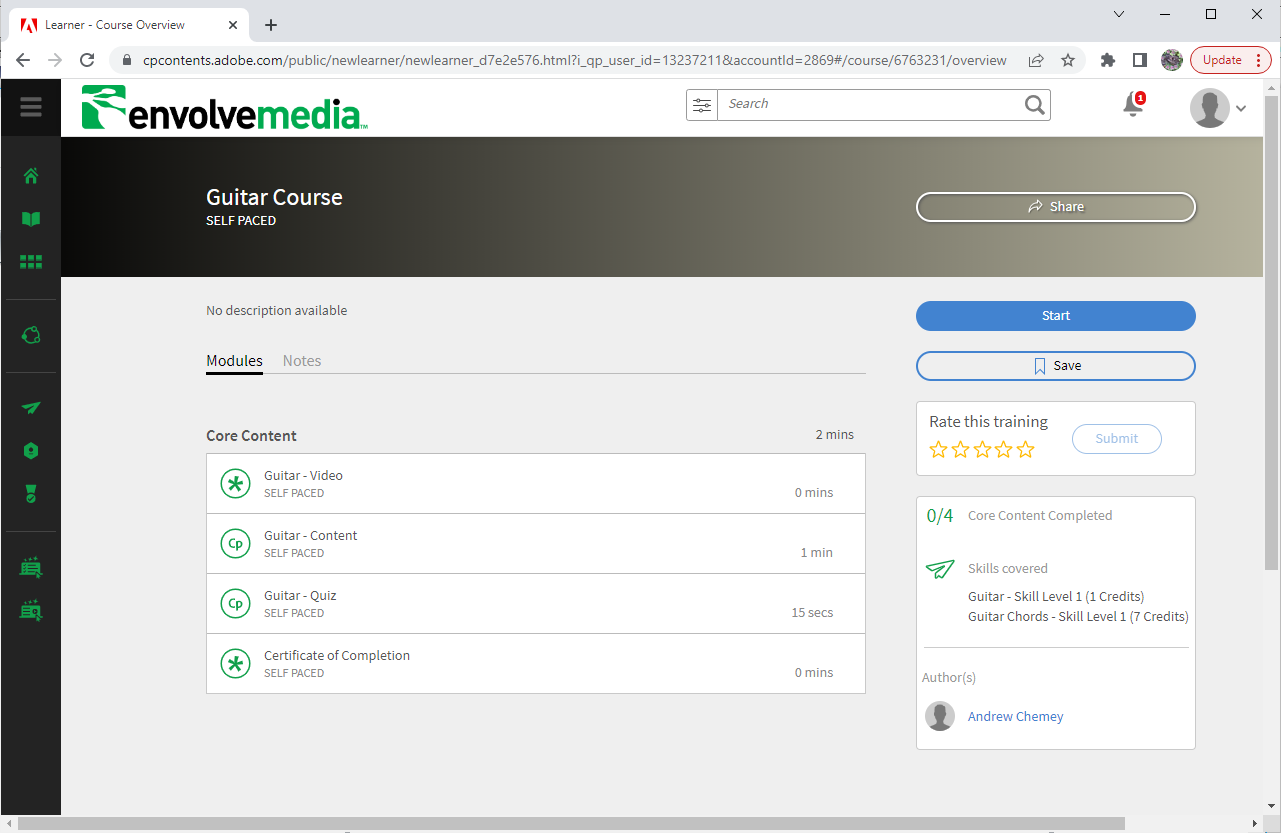
Example 2: Multi-module course in Adobe Learning Manager. Next Item functionality works with the first three modules to launch the next module

Documentation
Overview
The NextItem Widget by Envolvemedia provides an easy way for your end-users to launch the next item in an Adobe Connect Curriculum or any Course, Certificate or Learning Path in Adobe Learning Manager (ALM). Normally, in Adobe Connect, a learner would launch the Curriculum Viewer or otherwise launch the first item of a Curriculum, complete it, close the browser and find the next item to launch it. They would continue this process until all of the required items have been completed. In Adobe Learning Manager, the learners could follow a similar process or use the Launch Next Module button in the Fluidic Player. The NextItem Widget is designed to allow the learners to seamlessly navigate from item-to-item, simply by clicking a button in your Captivate courses. The NextItem Widget dynamically determines if there is a next item and if there is, will enable button for end-users to click to launch it automatically. Optional settings will store information about the next item in Captivate variables for use in displaying or using that information to determine the flow of the Captivate file.
Captivate Authoring
As a Captivate developer, when a NextItem Widget is added to a slide, its properties dialog appears. This dialog also appears, when double-clicking on the widget after it’s been placed/configured.
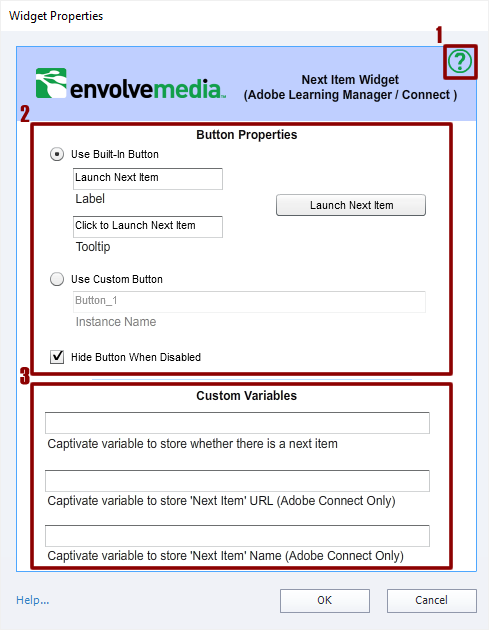
NextItem Widget Properties Dialog
There are three areas of interest in the NextItem Widget properties dialog:
- Help/About button
- Button Properties
- Custom Variables
Help/About button
Clicking the help/about button will display the About dialog for the NextItem Widget. This dialog shows the version information and provides links to the online documentation (this page), a link to send an email to Envolvemedia for providing feedback or get support, and a button to check for updates to this widget.
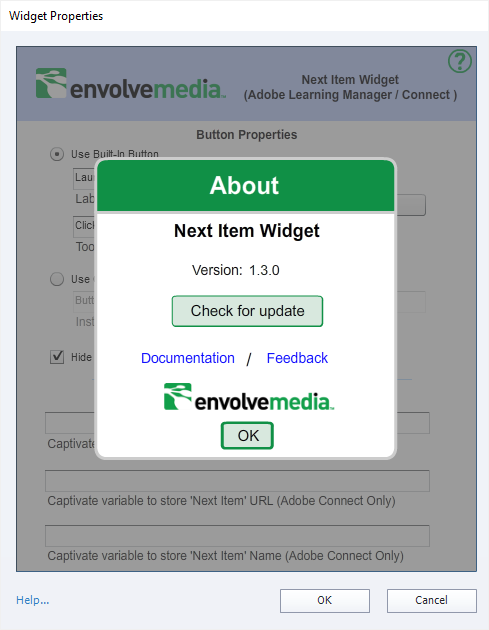
Help/About Dialog
Button Properties
By default, the NextItem Widget will create an HTML-based button on the stage at runtime. This button makes it easy to just add the NextItem Widget functionality to any presentation. To customize the look/feel of the button, you will want to create a custom widget.
Built-In Button
To use the default or built-in button of the NextItem Widget, select Use Built-In Button. Then, change the label of the button and the tooltip of the button, if warranted.
![]()
Widget: Built-In Button (that appears on Captivate stage)
NOTE: The button that appears on the stage during Captivate authoring, is not the same button that is generated at runtime – or when published.
Custom Button
To use your own button for saving to a file, add the button to the Captivate stage. Select the button and open up the Properties panel
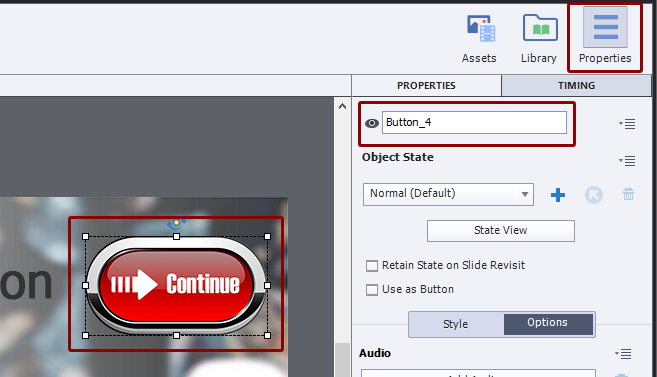
Custom Button Properties
Note the Instance Name in the Properties panel. In this case, the Instance Name is Button_4
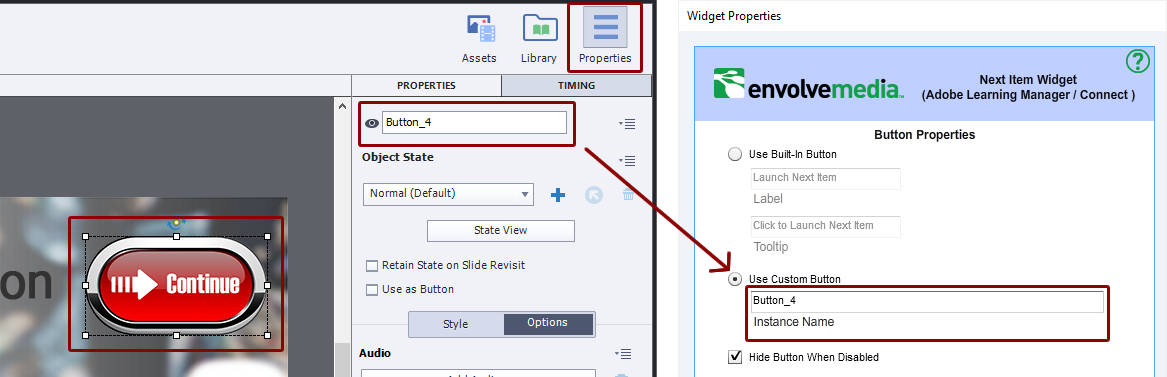
Setting Custom Button Properties in the NextItem Widget
This is the value to use in the NextItem Widget Button Properties for the Custom Button
![]()
Widget: Custom Button (that appears on Captivate stage)
NOTE: When selecting a custom button, the Widget will appear “blank” in the Captivate Authoring file, but will not appear at all when published. This allows you to set the properties of the NextItem Widget. It is important to actually have the widget on the stage and not attempt to place it out of the stage bounds, for it to work properly.
Custom Variables
As a Captivate Developer, you have the ability to create three variables in Captivate, which are populated by the NextItem widget. These variables will store:
- Whether there is a next item/module available (type: string, value: “true” or “false”)
This is only populated when the captivate file is published/launched from Adobe Connect
- The URL of the next item (type: string: value: fully-qualified URL of the next item)
This is only populated when the captivate file is published/launched from Adobe Connect
- The name of the next item (type: string: value: name or title of the next item)
These variables need to be created manually in Captivate Project > Variables dialog, before they can be used.
There will probably be a timing issue with how these variables are populated. The variables are populated when a slide that contains the NextItem Widget with the variables referenced is viewed. However, some events may occur before the variables are populated. If you are using an On Enter event in Captivate that depends on these variables; or you are using a variable in any text caption on a slide, those events may occur before the variables are populated. It is highly recommended to use a separate NextItem Widget on an earlier slide, such as slide 1, which is only used to populate the variables.
To do this:
- Insert a NextItem Widget on Slide 1 that is set to use a Custom Button
- Delete/do not enter any instance value for the custom button
RESULT: When the slide is loaded, the variables for the file are set at that point
- Use the variables at any point after Slide 1
- Insert a NextItem Widget on the slide that you want to actually use a button